
Party Favor #1:DIY Foam Lightsaber

I used this pin, as my “how-to.” Click the picture to go to the website!
Materials: 8 Foam Pool Noodles from Dollar Tree, Sharp knife (or saw,) Silver Duct Tape, Black Electric Tape
These were so easy!! By far, the easiest of all Noah’s DIY party decor. I bought 8 pool noodles and cut them in half with a large, sharp knife. I wrapped the end with duct tape 3 times. I wrapped the end with black electrical tape- at the top, middle and bottom of the duct tape and used 2 little pieces for the “buttons.”

16 finished lightsabers 🙂 Of course, in a diaper box to transport to the party!
 Epic lightsaber battle!! The kids LOVED these! I heard from one mom that her son sleeps with it every night.
Party Favor #2: DIY Lego Head Candy Jar
 I used this more as a picture than a “how-to” because it did not come with instructions! I have been saving glass baby food jars for months. When I found this craft, I was so excited to incorporate my recycling! It was the most tedious, time-consuming DIY of the whole party!
Materials: 16 Glass Jars, Black Chalkboard Paint, Yellow Acrylic Paint, Candy Blox bought on Amazon, 4 pieces of Tissue Paper, 16 Snack-Size Ziplock Bags or Clear Plastic Wrap, Black Black Scrapbooking Marker
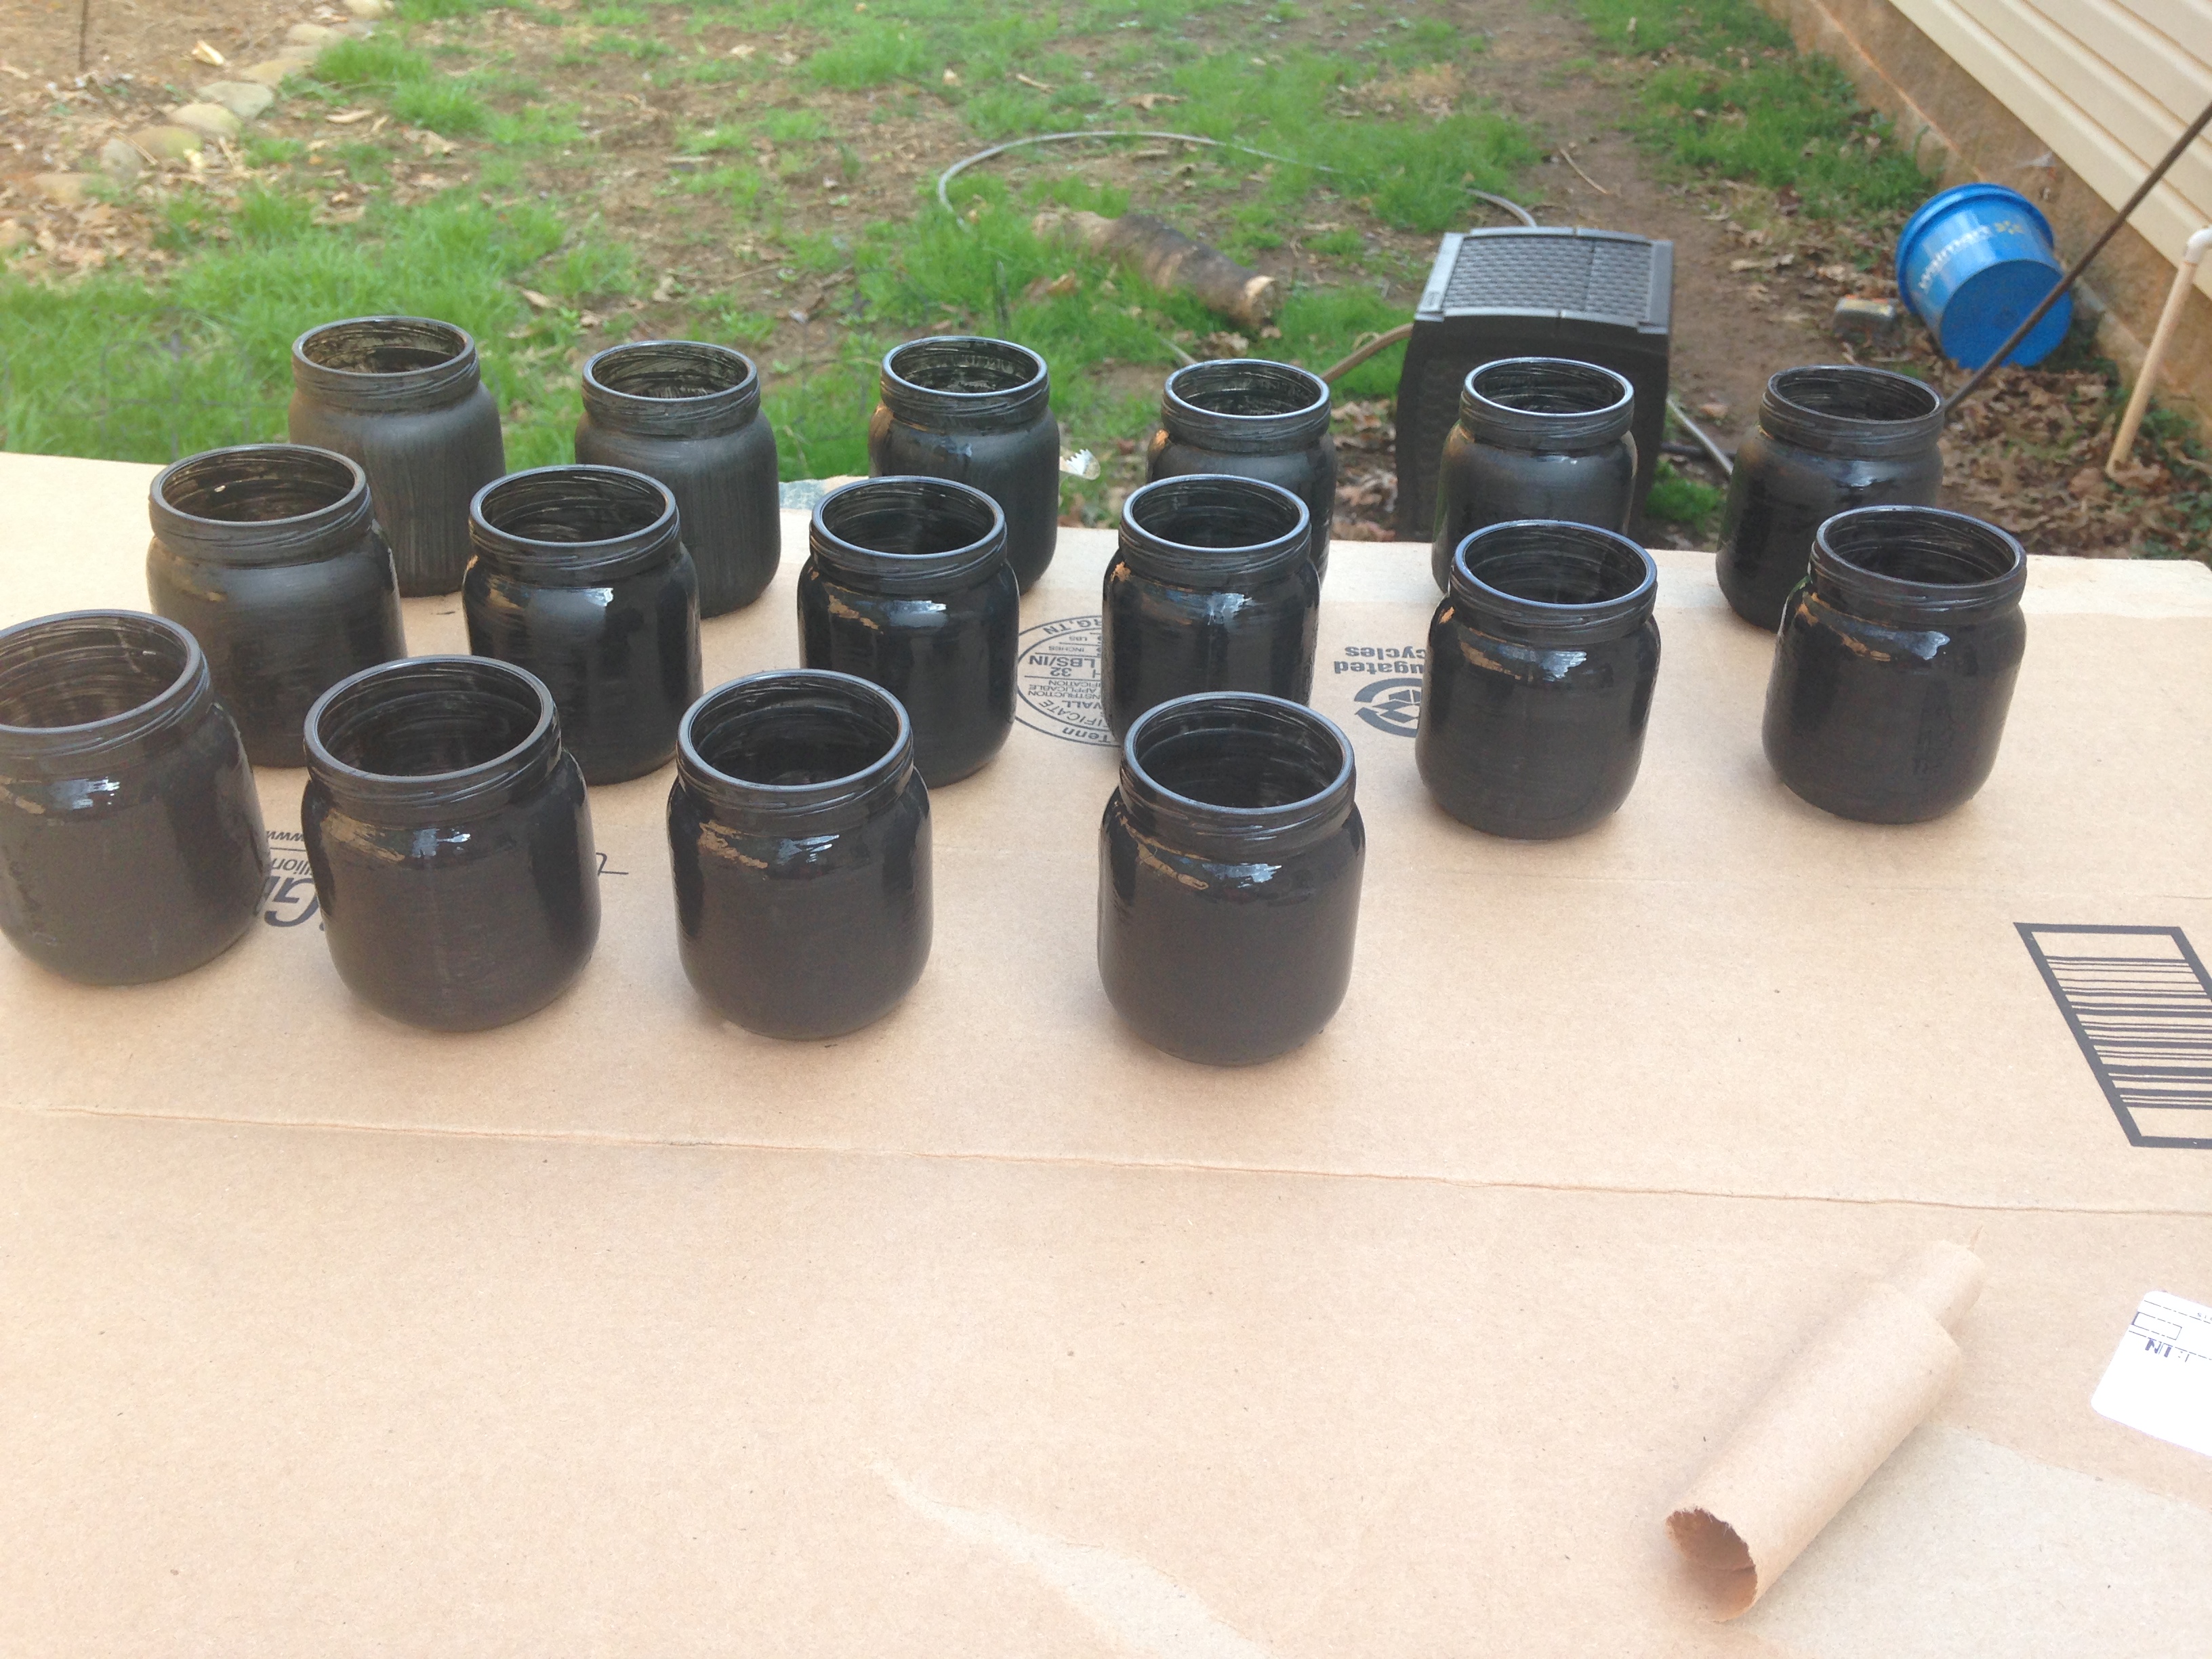
Step 1: Paint the glass jars with black chalkboard paint. 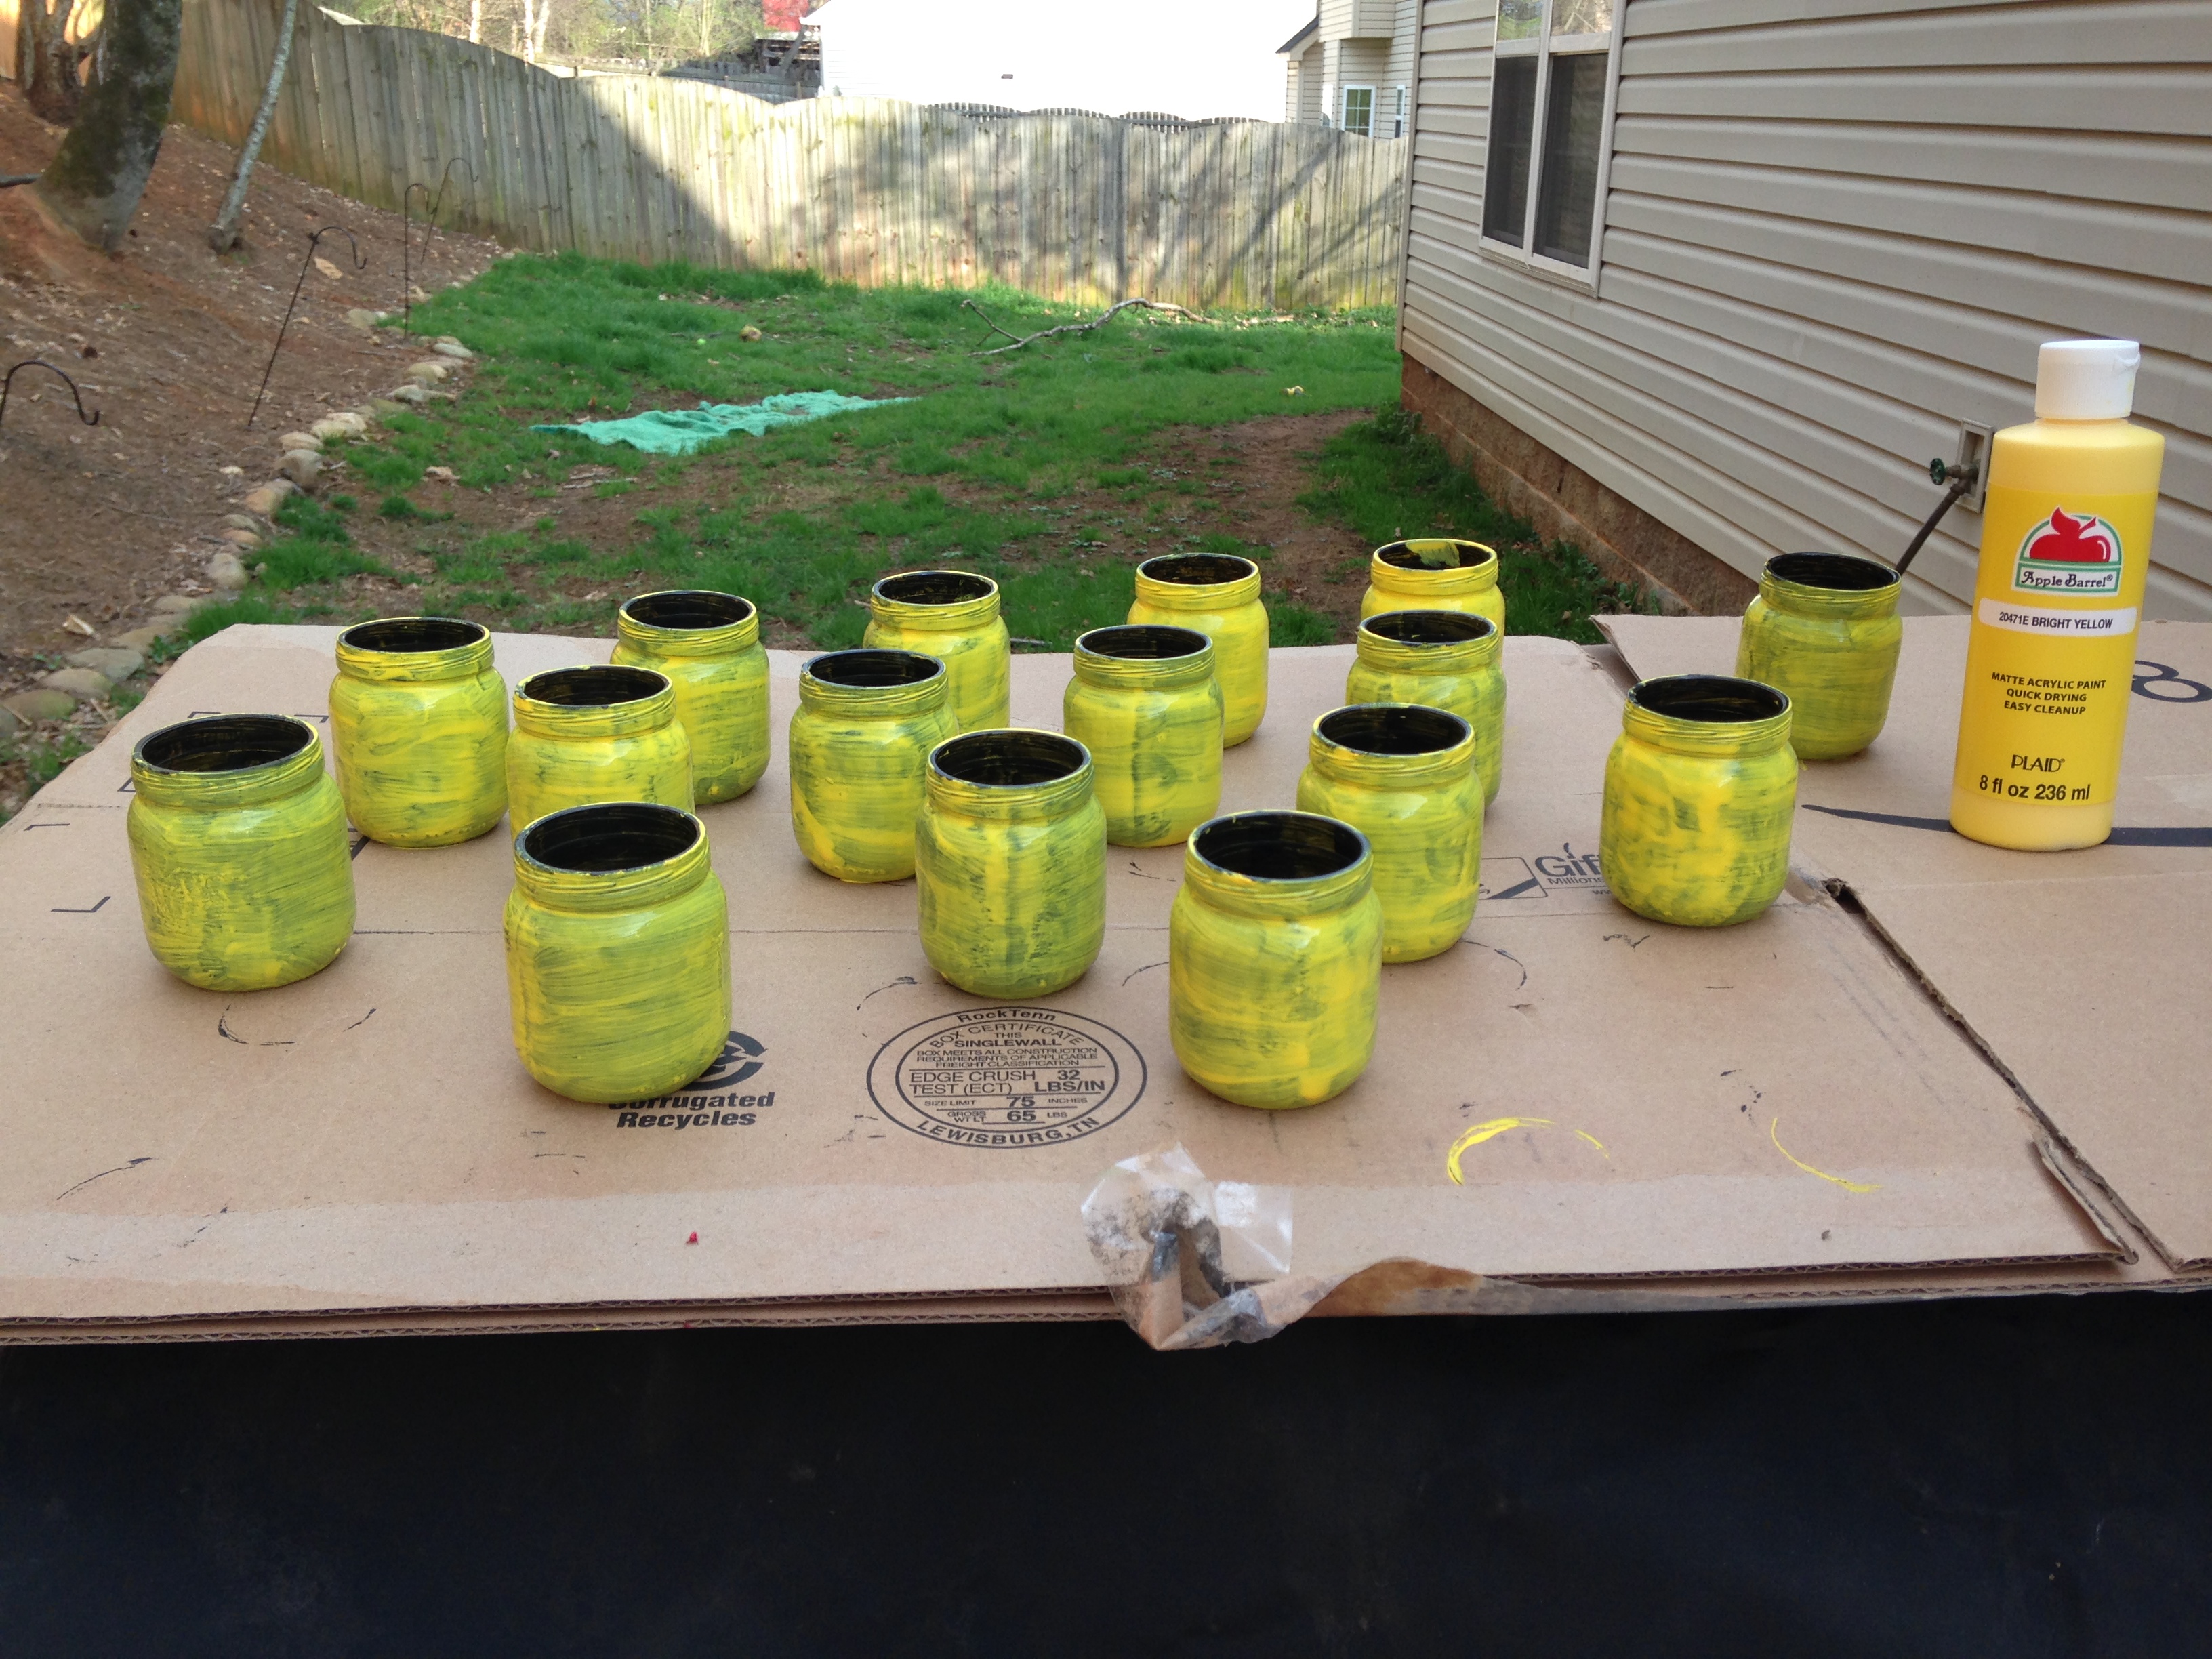
Step 2: Apply first coat of yellow acyclic paint (of many!)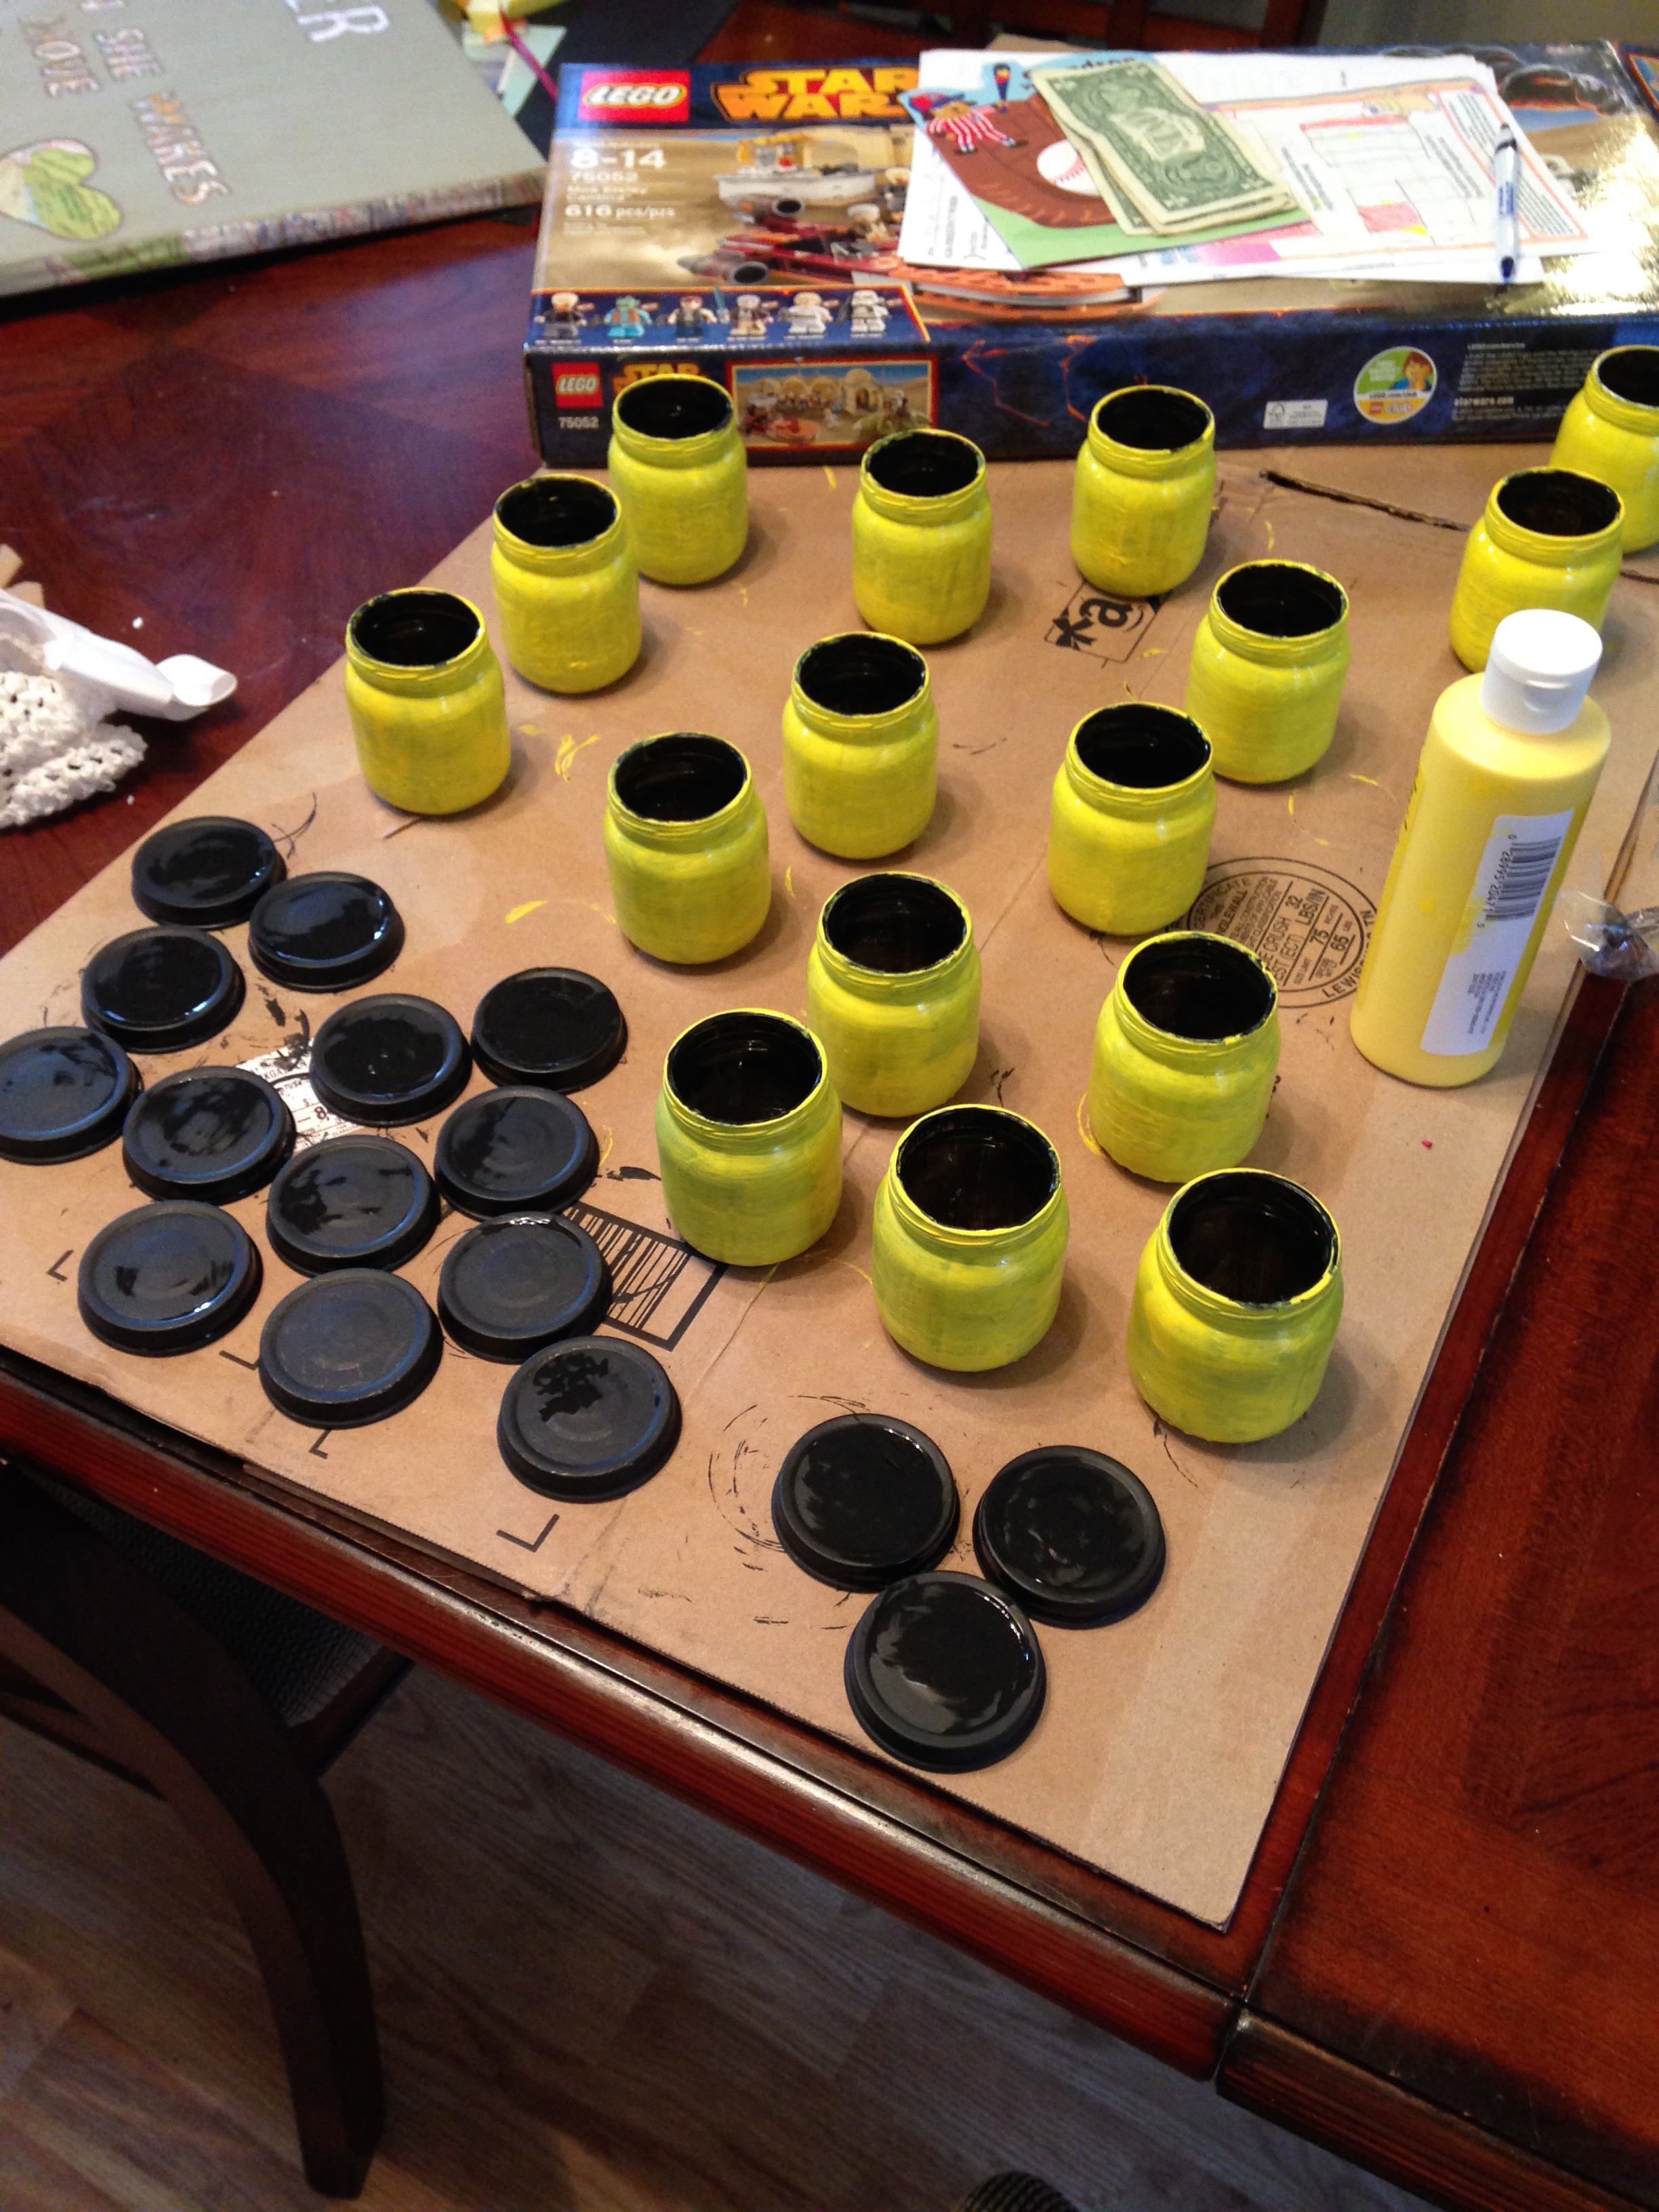
Step 3: Apply another coat of yellow paint. Paint the lids with black chalkboard paint** THIS DID NOT WORK. More details below.
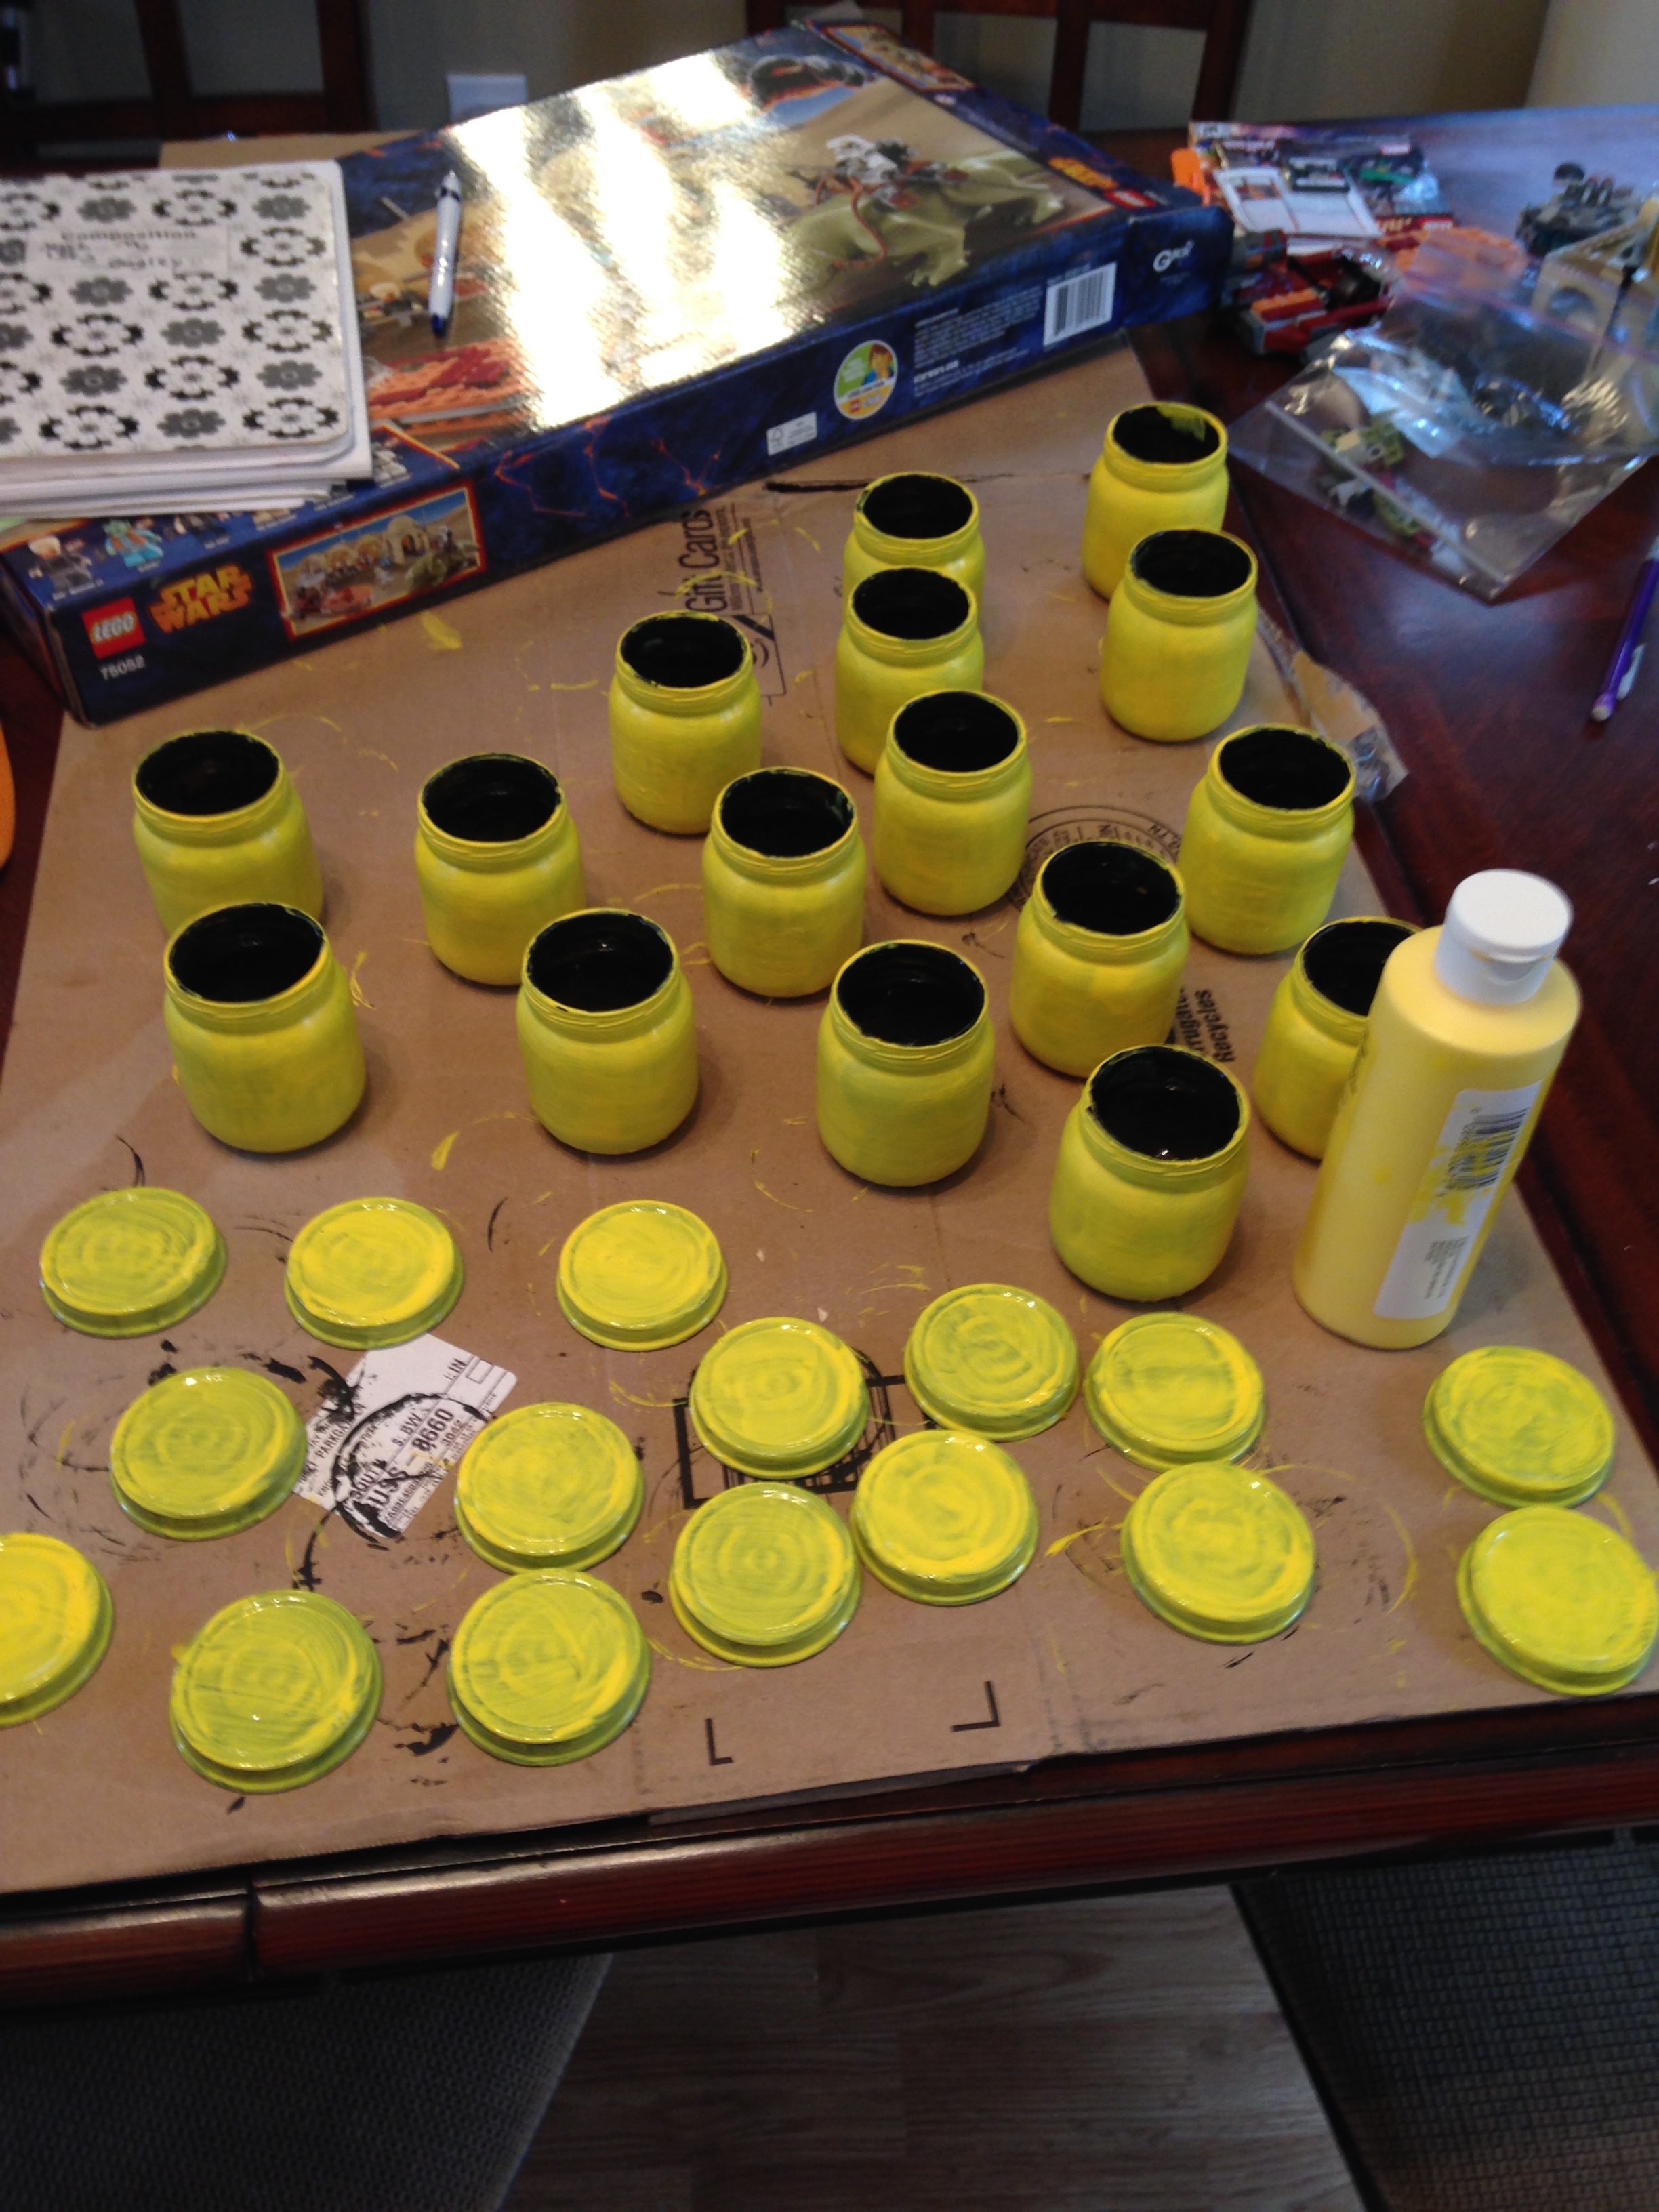
Step 4: Apply ANOTHER coat of yellow paint. Paint the lids yellow.** AGAIN, THIS DID NOT WORK. See next picture. 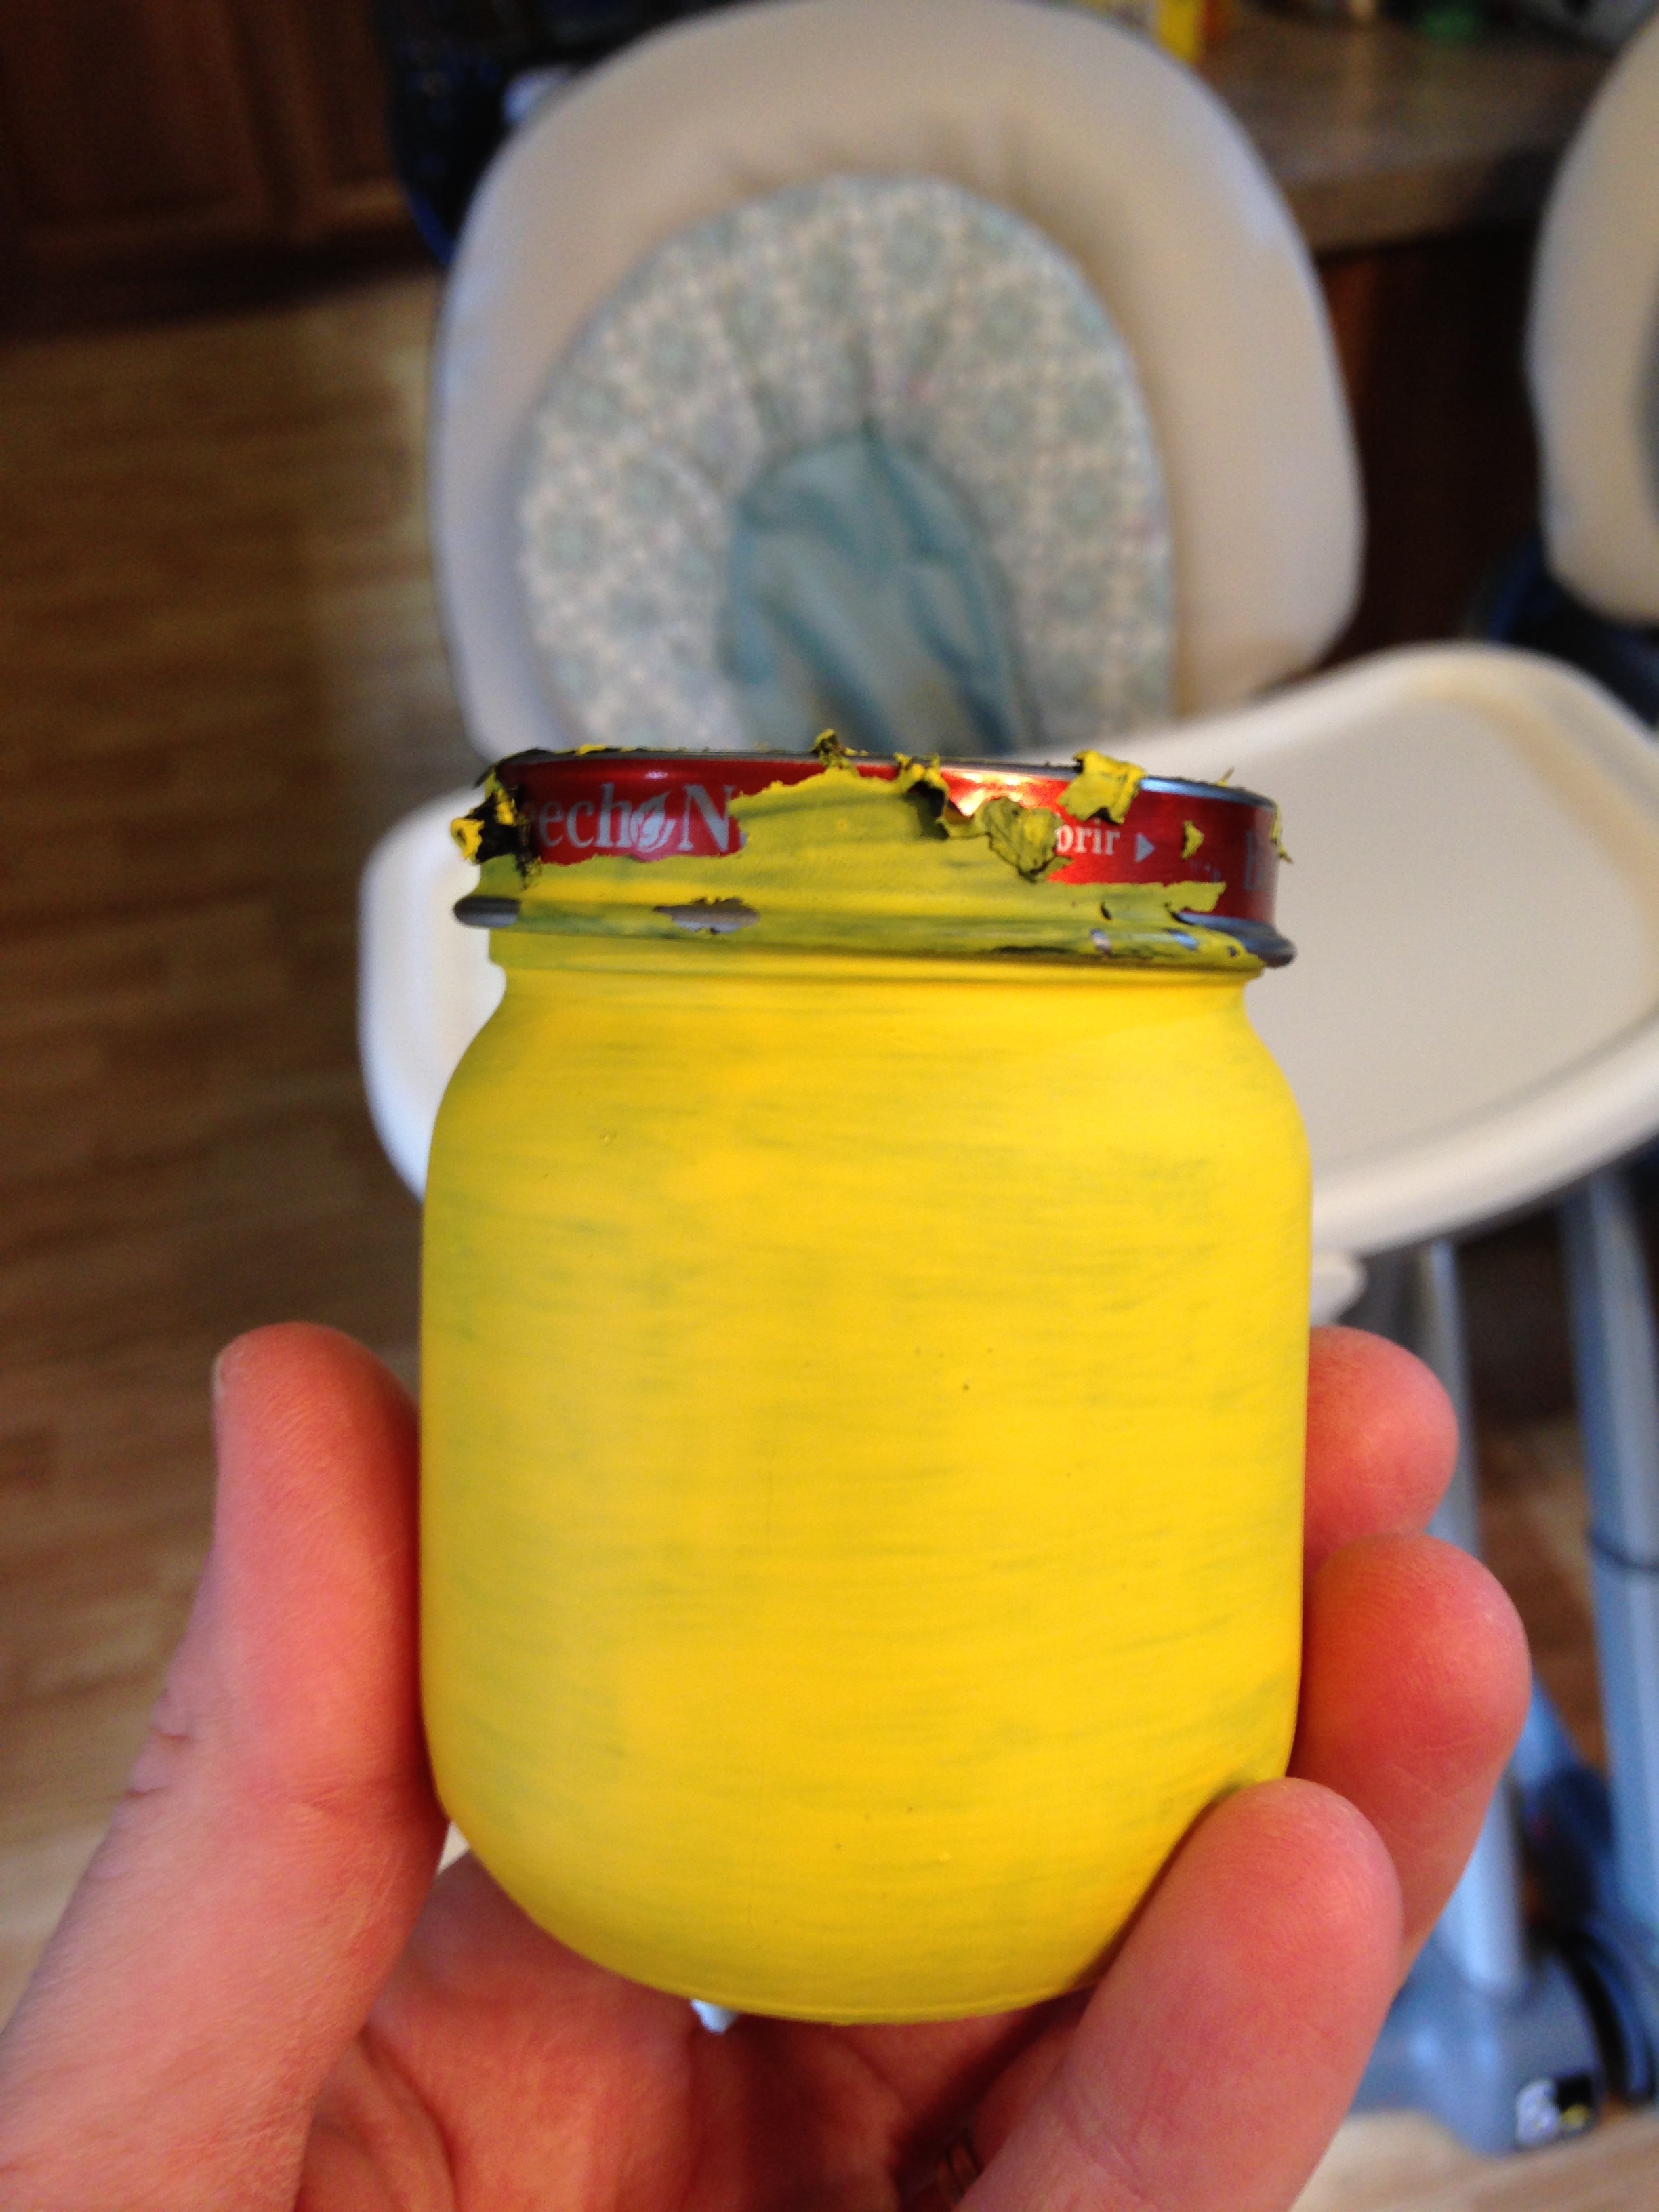
Step 5: Attempt to put painted lid on painted jar. Yell in frustration.
After spending so much time meticulously painting these jars, I was so mad when the paint peeled right off the lid. Pinterest did not warn me about that. Perhaps I could have bought yellow spray paint for the metal lids, but it was the night before the party so I had to improvise.
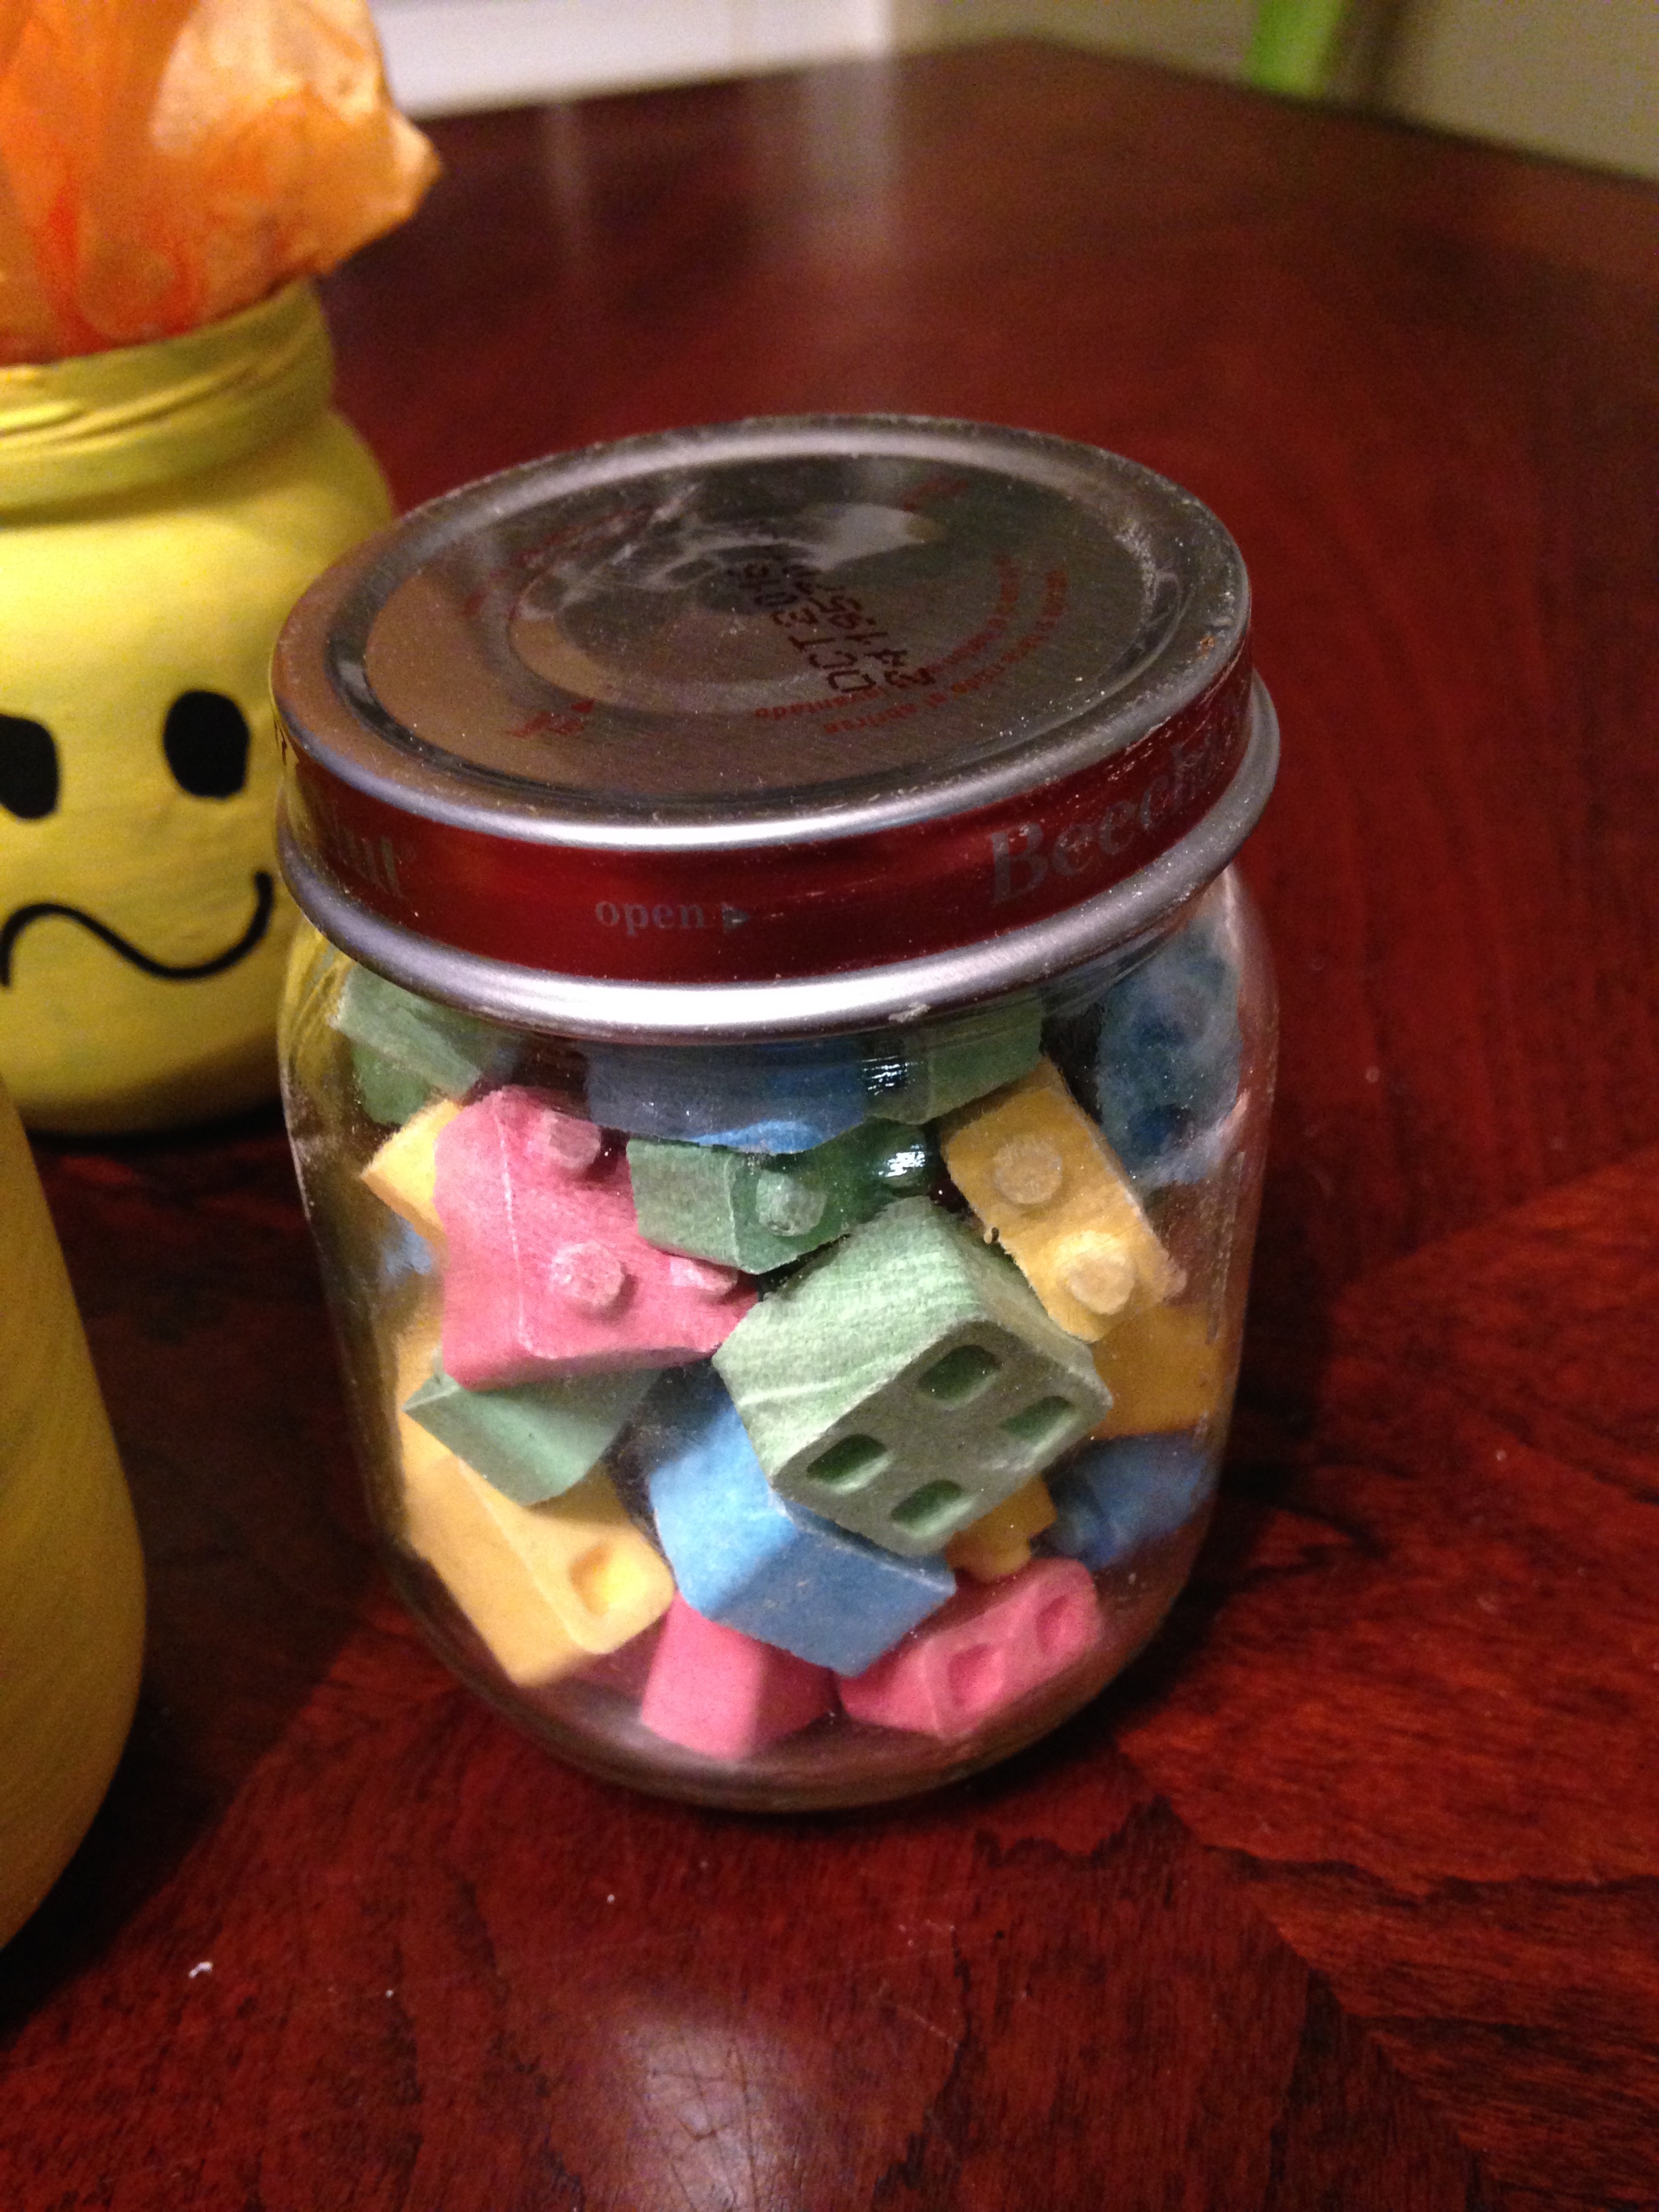
Step 6: Figure out how to store the Candy Blox in the jars without the lids.
I purchased these Candy Blox (that’s the exact name, I am not misspelling the word blocks) from Amazon in a two-pound bag. I had enough for 16 jars of candy and still had a little left over. Since I could not use the lids, I resorted to snack-sized Ziplock bags and tissue paper. I ran out of Ziplock bags (another yell of frustration,) so I also used plastic wrap.
Step 7: Cut 1 piece of tissue paper into fourths. Pour some Candy Blocks into a Ziplock bag or plastic wrap. Set “baggie” in middle of small tissue paper square (1/4 of that original piece.) Squeeze tissue paper/baggie combo into the glass jar. Fluff the “Lego Man’s” hair until you are satisfied with it.
Step 8: Add faces to your “Lego” creations. I tried using black sharpie first but it was too thin for my liking. When I tried to make it thicker, it scratched off the paint SO I used a black scrapbooking marker that I had (bought at Hobby Lobby) and it worked awesome! All 16 Lego head party favors ready for the party!!
